When you send your Android phone in for repair, you want to give the relevant specialists all the access they want to run diagnostics and what the challenge is. At the same time, you don’t want them to flip through your images and videos, or post them on any of your social media accounts.
That’s where Committed Repair Mode comes in: If you have an eligible phone, this mode creates a new partition on your phone, separate from the one where you’re connected to your apps and where all your private files and data are. stored. The phone can still be used and inspected, but is in “factory new” condition. You can find it on some Pixel phones (where it’s called Repair Mode) and some Samsung phones (where it’s called Maintenance Mode).
It doesn’t take long to activate repair mode. However, the same precautions as always apply: even when you turn on repair mode, you deserve to back up everything on your Android device in advance, in case a hard reboot is necessary to get the device working again. We also suggest that you remove your SIM card.
The repair strategies we present here are suitable no matter where you fix your phone, whether it’s the official Google or Samsung channels, your local Best Buy, or whatever other position you decide to accept with your phone.
To use repair mode on your Pixel, your Pixel will need to run the Android 14 update released in December 2023 or later for the operating system. You also want at least 2GB of storage space on your phone (select Storage in Settings if you want). verify).
To turn on repair mode, go to Settings, then tap System & Repair Mode. You will get data on how it works and then you can tap Enter Repair Mode to release it. You’ll want to check your phone’s security PIN. pattern or password for your data. After restarting, your Pixel phone is in a position to be bypassed or shipped.
Once your phone is (hopefully) repaired and returned to you, you can either go back into System and Repair mode to get back to normal, or you can tap the notification at the top of the screen. You will need your PIN, password or trend to exit repair mode, which prevents you from disabling the mode without your permission.
Any saved data or settings changes made during Repair Mode are wiped as you exit it, though any Android system updates that have been applied will stay in place. If you need to go into Repair Mode again, you’ll need to restart the process from the beginning.
Samsung’s maintenance mode is very similar to the Pixel’s repair mode, but it’s been around for much longer. It works on all recent Samsung Galaxy flagship phones running Android 13, from the Galaxy S10 series (which also includes the Flip and Fold foldable phones).
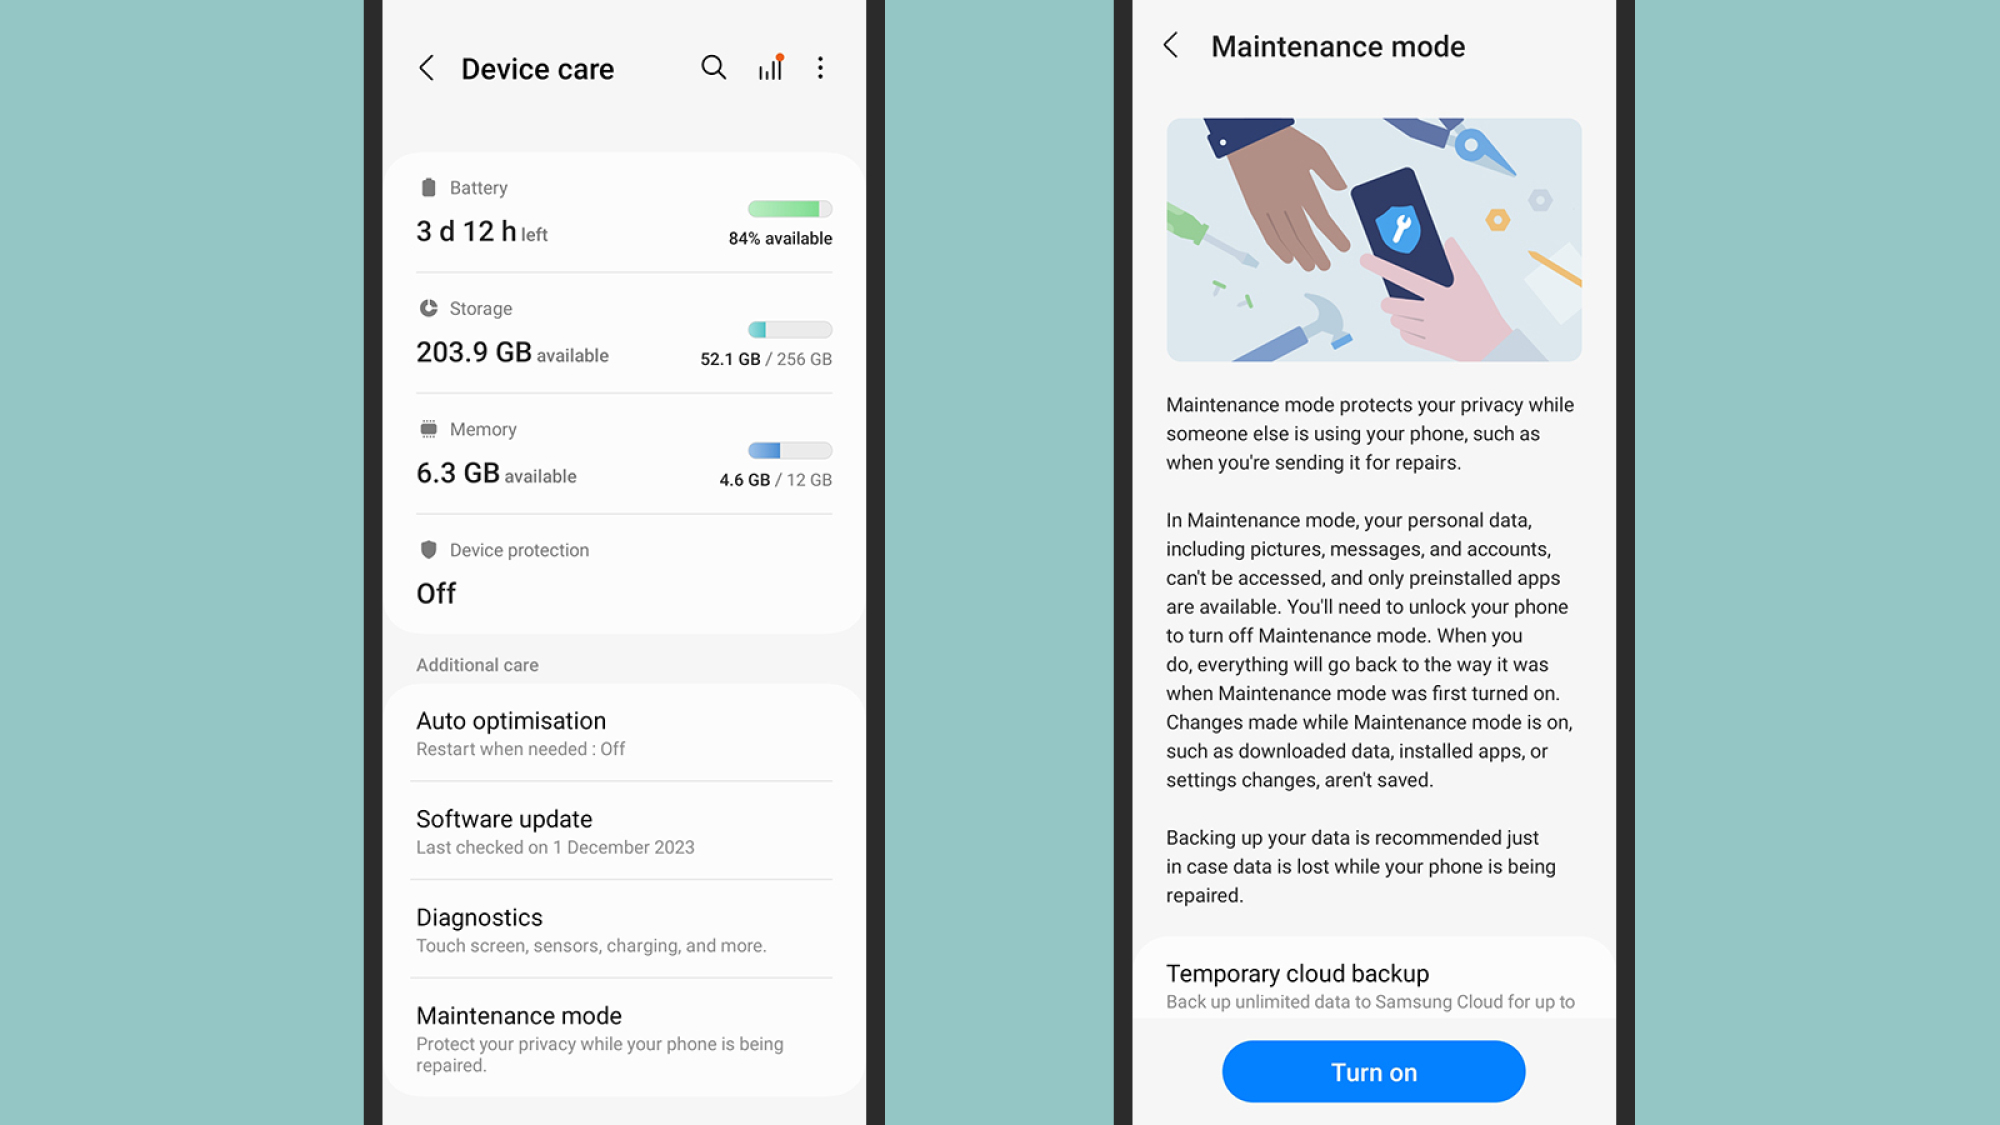
On your Samsung phone, open up Settings, then tap on Battery and device care. Pick Maintenance Mode and you’ll be reminded that it’s wise to create a backup of your data first. You’ll also get the option to create a temporary, 30-day backup in the cloud if you don’t already have one in place.
When you’re ready to continue, tap Enable to activate the feature. By default, your phone will create a record of formulas that can be analyzed by repair technicians, and I recommend that you don’t turn it off before Urgent Reget begins. Your phone will then boot into maintenance mode and be in a condition to be repaired.
To exit maintenance mode, you need to tap the notification at the top of the screen and then select Exit. Then, the general method of unlocking your phone (such as a PIN or fingerprint) will be required to make sure it’s the one performing the action. If you haven’t already set up a screen lock, you’ll be prompted to create one before restarting your phone in maintenance mode.